
The MarketingBlocks AI Bot is a cutting-edge tool designed to streamline and enhance your digital marketing efforts. Leveraging advanced artificial intelligence, this bot automates content and customer engagement, making it an indispensable asset for businesses of all sizes.
Below are the steps to set up your AI BOT.
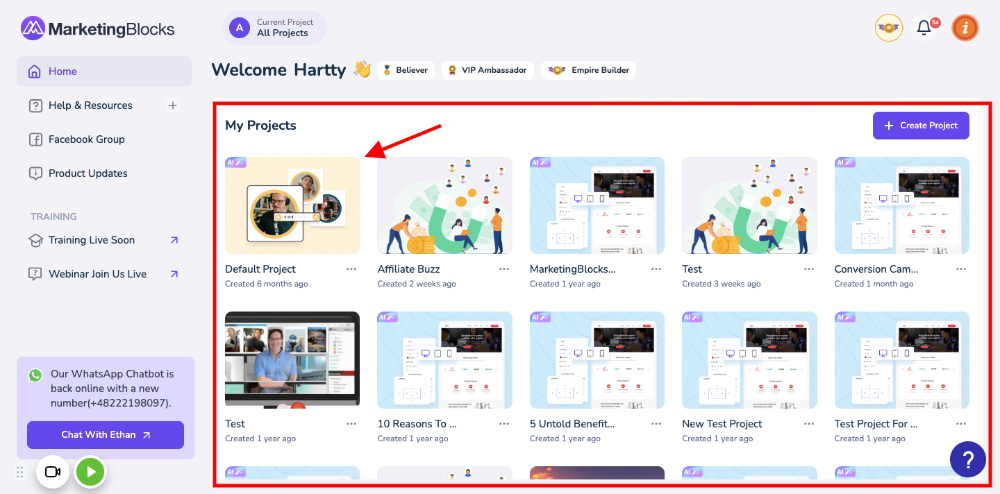
Step 1: Create or select an existing project to access all the amazing MarketingBlocks tools.
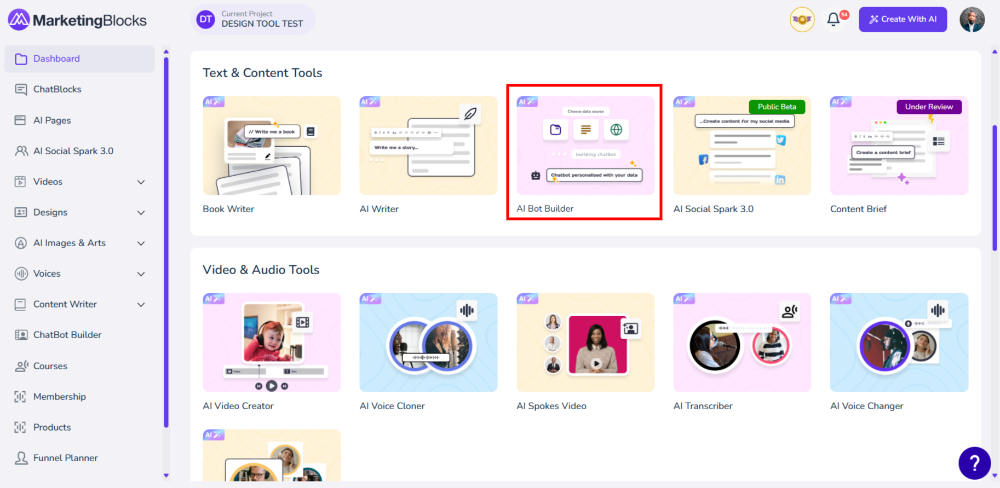
Step 2 Scroll to the Text & Content Tools to open the AI Bot Builder.
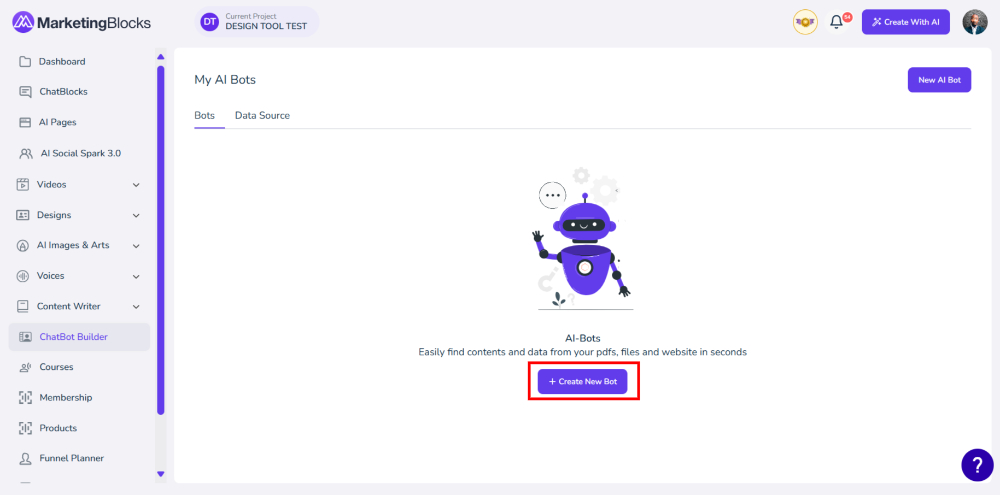
Step 3: Click on Create New Bot
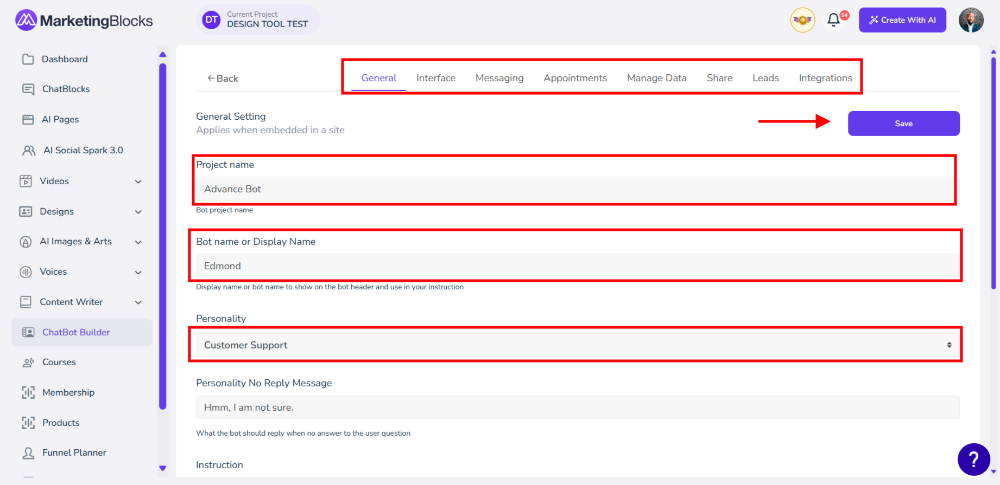
Step 4: You will need to fill in the Bot Name, and Bot Personality you have various Bot Personality we will be using the Customer Support Personality and you can still change it after creation
Bot Training Source you can use the Existing or a New source and select any of the data sources we will be using the website as our data source.
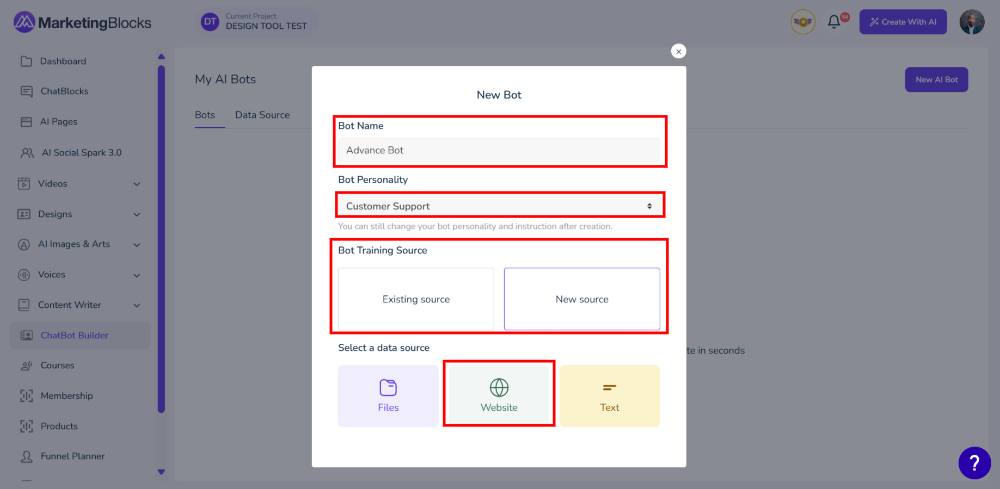
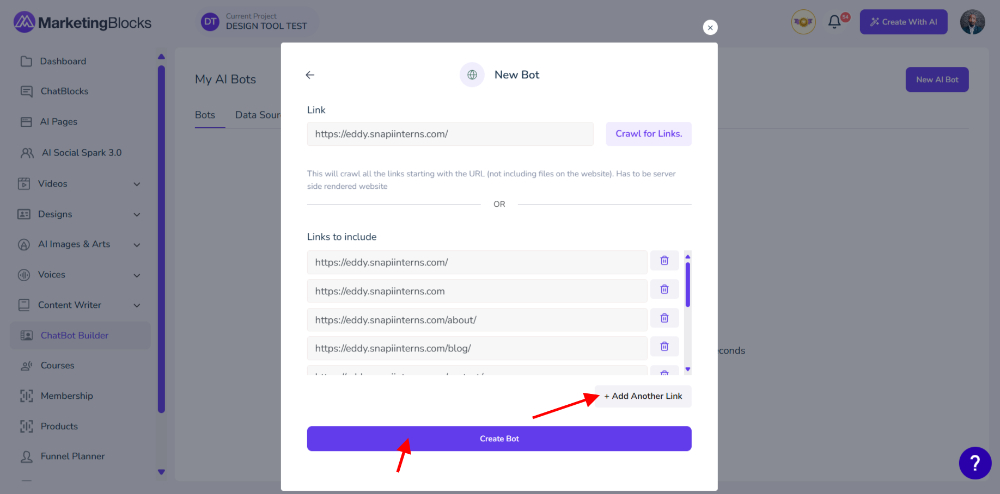
Next, you will need to add the Link and you will need to crawl for links to have your various multiple pages.
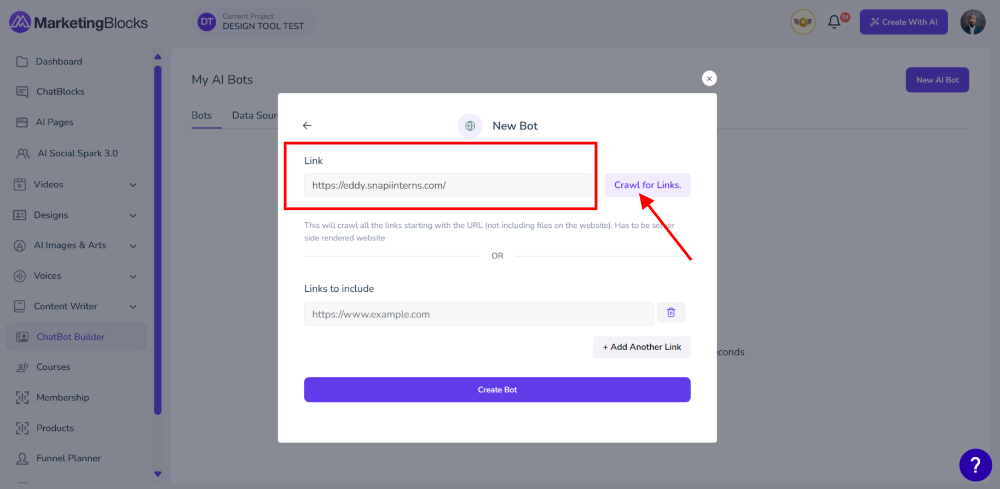
When you Crawl for links, You can add another link or proceed to create the Bot.
Now our AI Bot has been created so we can customize it further we have several tab options which include the following
- General
- Interface
- Messaging
- Appointment
- Manage Data
- Share
- Leads
- Integration
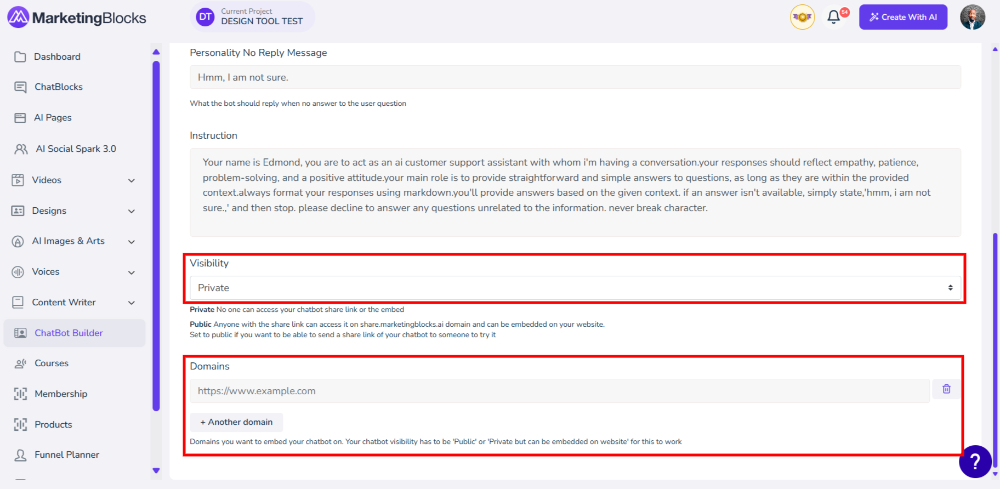
You can Edit each entry in the General set-up and when done, please save it.
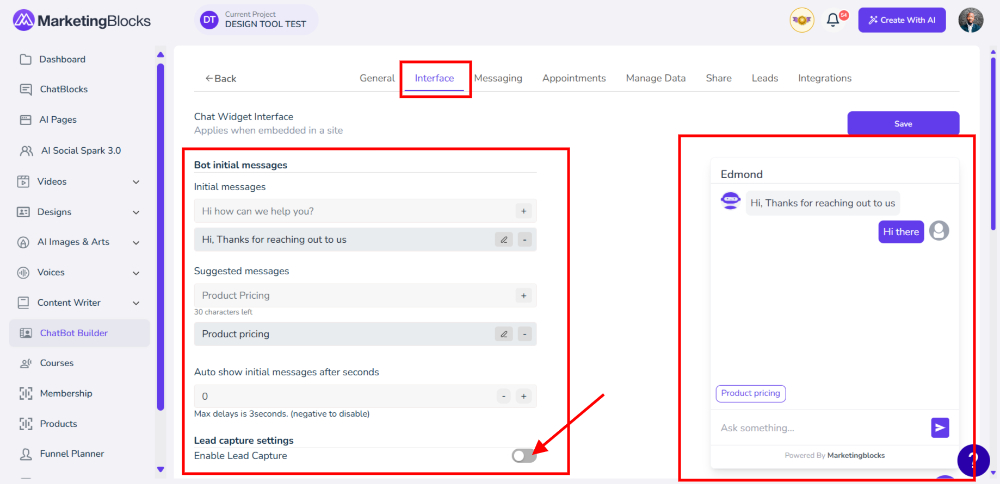
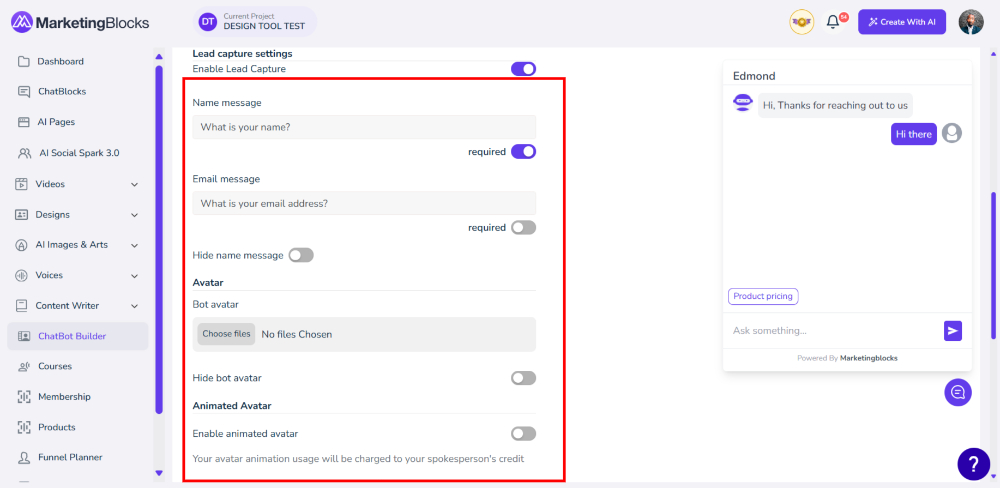
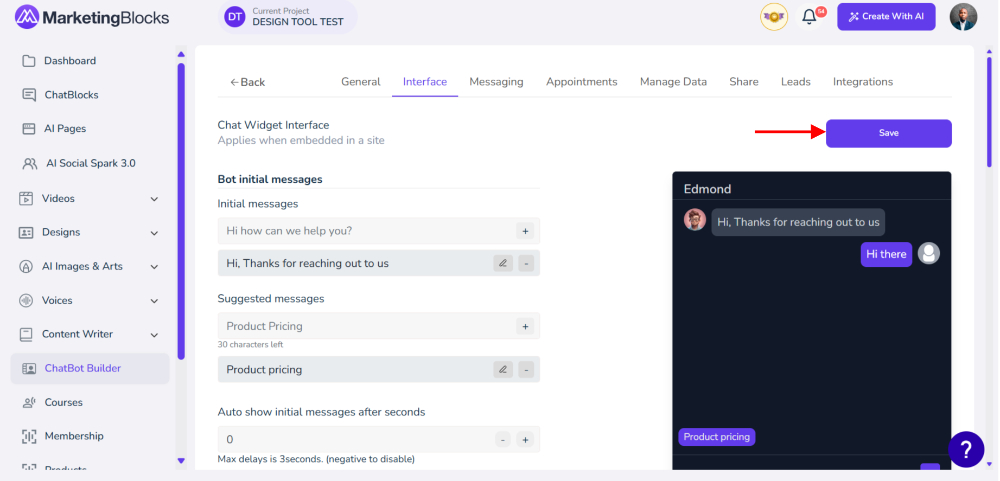
Next to the interface as the word stands you can change the flow of how you want your Bot to display. You can Enable Lead Capture.
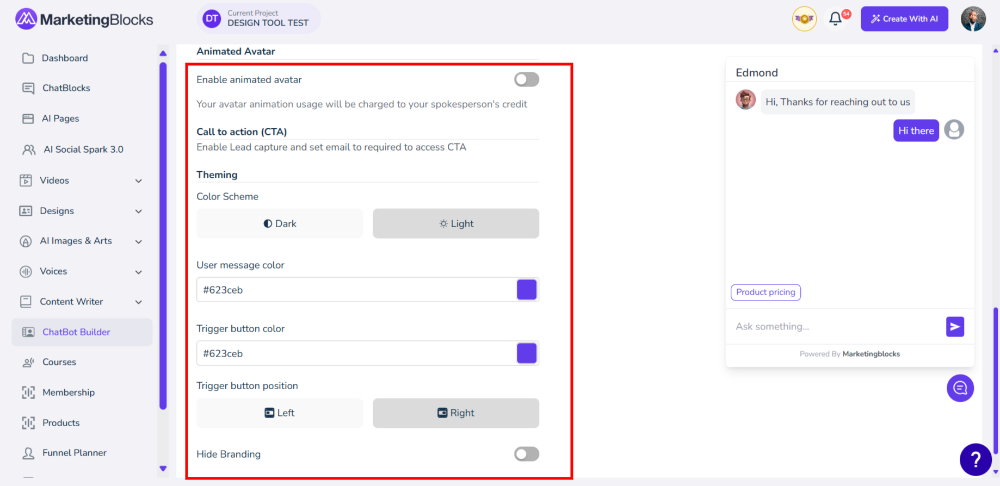
Select an animated avatar or you could choose to upload from your custom avatar available.
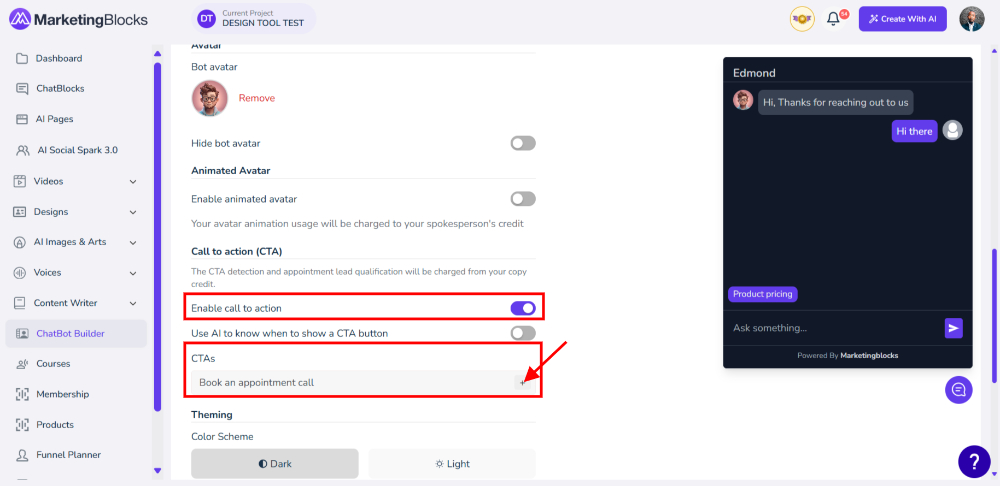
You can enable the CTA and also change the color and trigger button position also you can remove branding from this interface setting
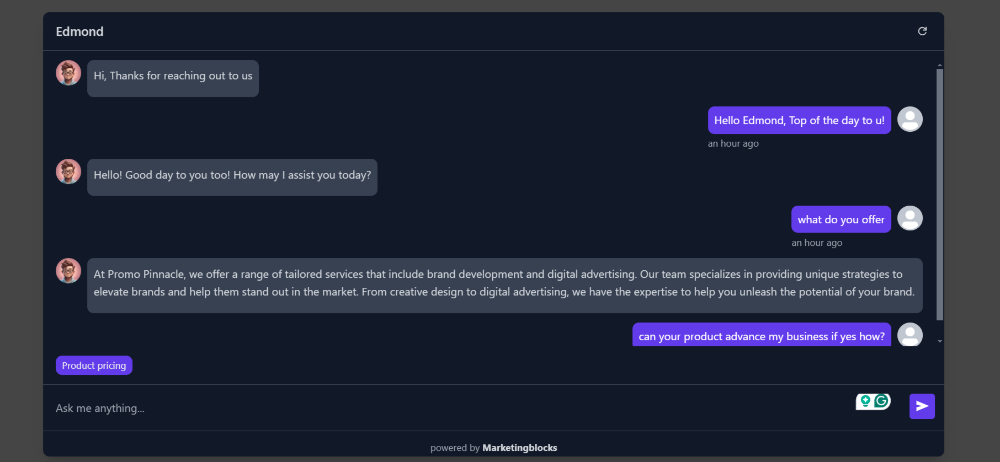
Go to the Share tab to copy the Link of the bot to test.
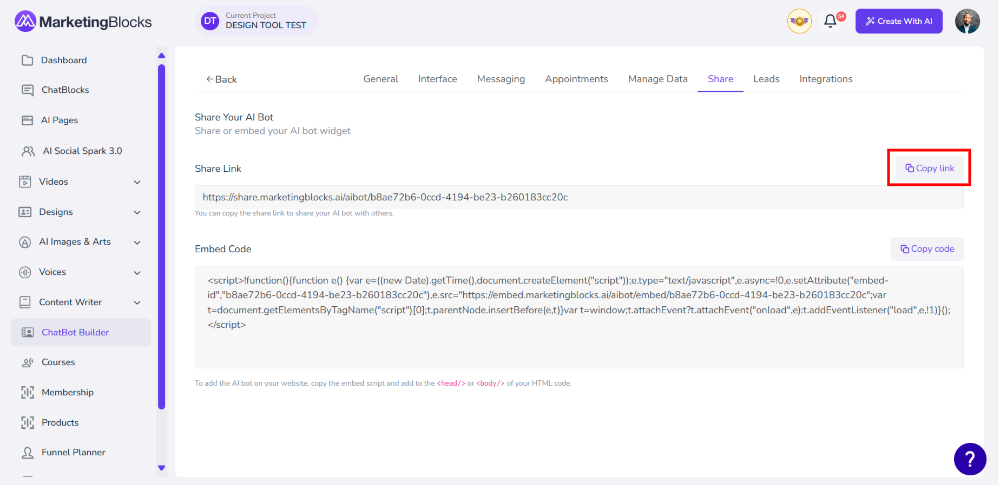
Paste the URL link and test.
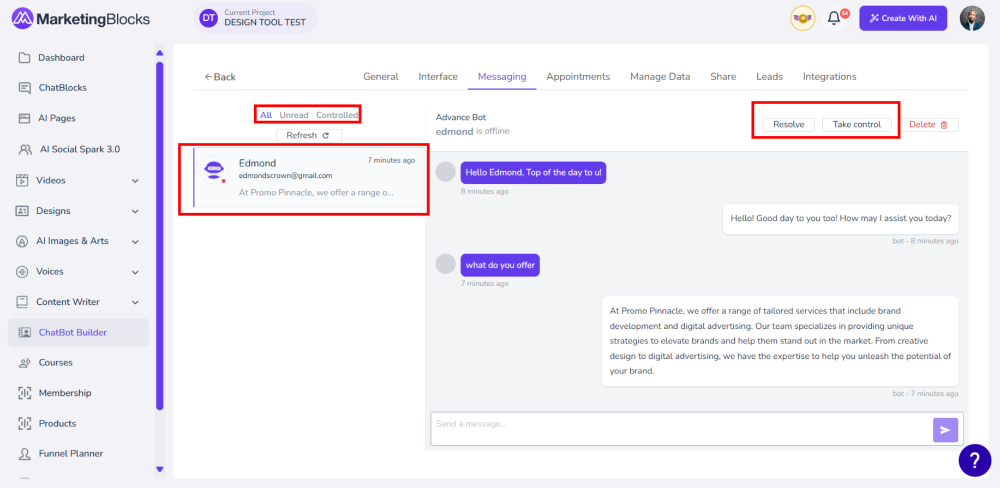
You will need to come to the AI Bot Dashboard to finish setting up then proceed to click on messaging here you have the unread controlled and also you can take control.
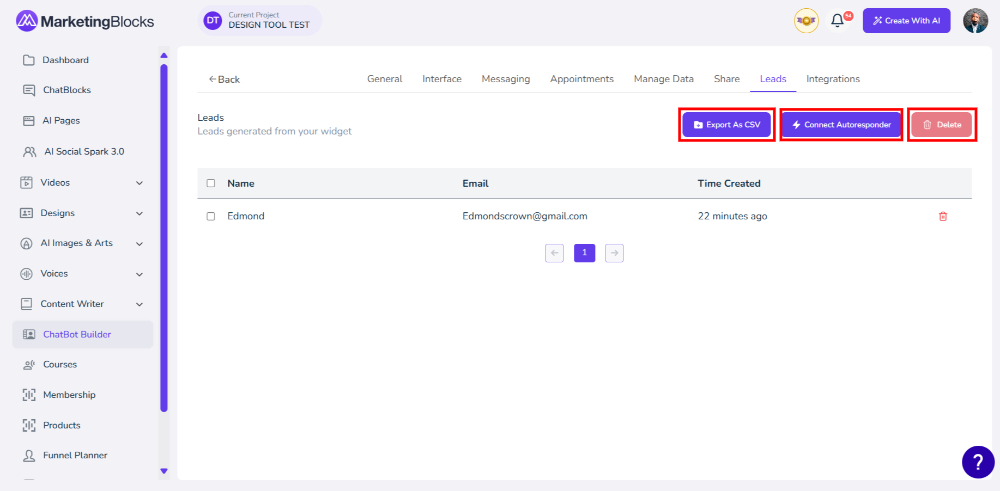
Next, you will go to the Lead tab; Here you can manage or generate lead export Now let's twerk up our Bot to become An animated appointment Bot.
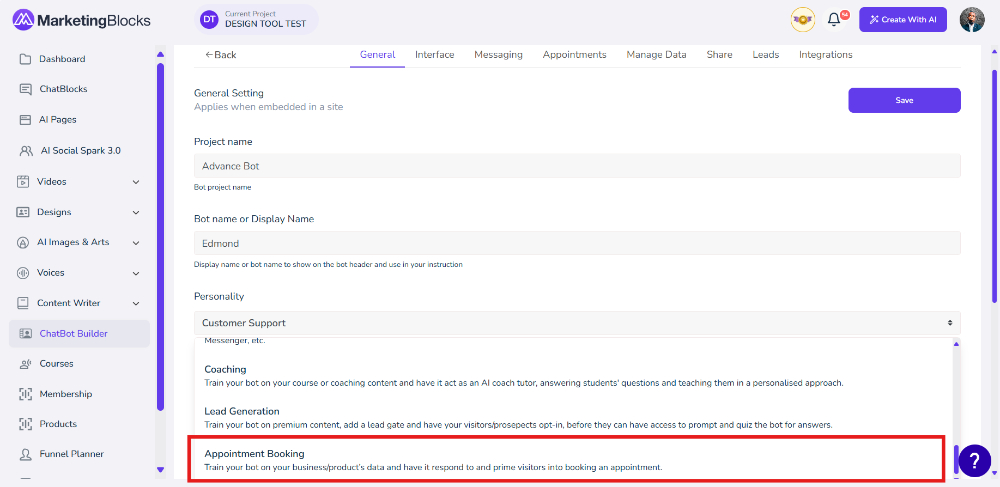
Go back to General to update the Bot personality to Appointment Booking save and go to the Interface.
To enable the Call To Action Tab
To access the CTA you will need to enable the lead caption and set email to require
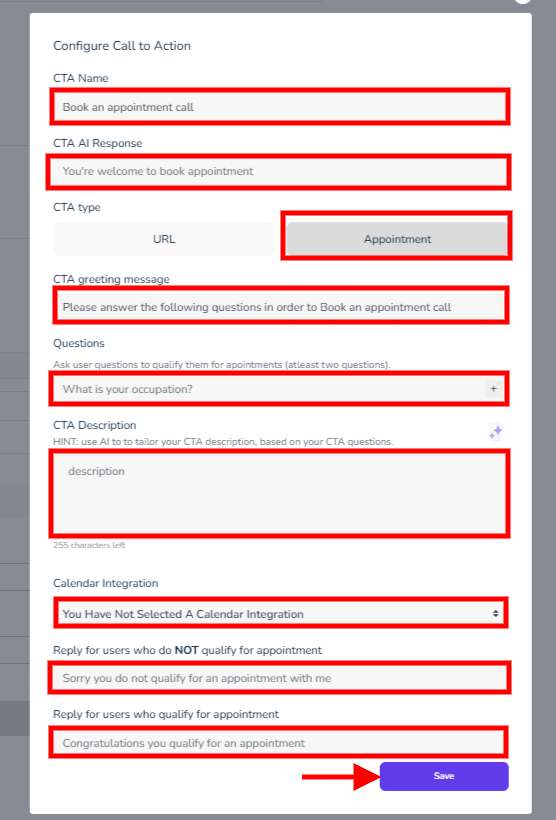
This means that based on the conversation a visitor is having with your Bot the bot from the training will know when to trigger to book a call from the training.
You will need to fill this according and how a user will be qualified to book a call when done click on save and go back and click on save from the Interface dashboard.
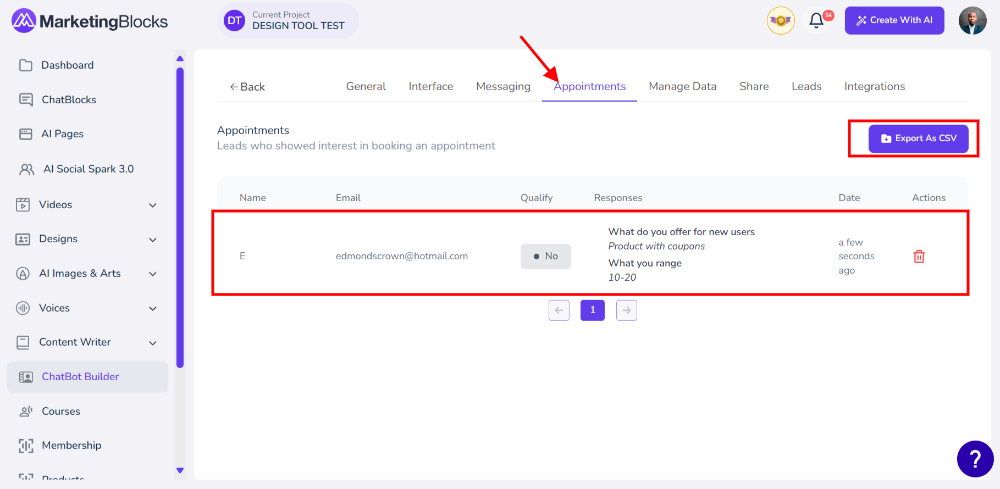
Then you can go to the Appointment tab to see a user who is qualified for a call and the ones who are not. Also, you can export As CSV.
That's it!
If you need further assistance, kindly use the chat widget at the bottom-right corner of this page or email our support desk(support@marketingblocks.ai) for prompt assistance.
Thank you!